If you are handling a team, school, or company project, it helps to learn how to design a custom jacket online as a clear step-by-step plan before you touch any buttons, and that plan should support the main tools you use to design your own jacket instead of trying to replace them. Think of this guide as the prep and workflow you do on paper so the Clothoo builder session feels quick and calm instead of rushed.

Why planning first makes your online jacket design smoother
A web builder is great at showing changes in real time, but it cannot decide your budget, colors, or roster for you. When those pieces are messy, people click around for hours, try random ideas, and still feel unsure when it is time to order.
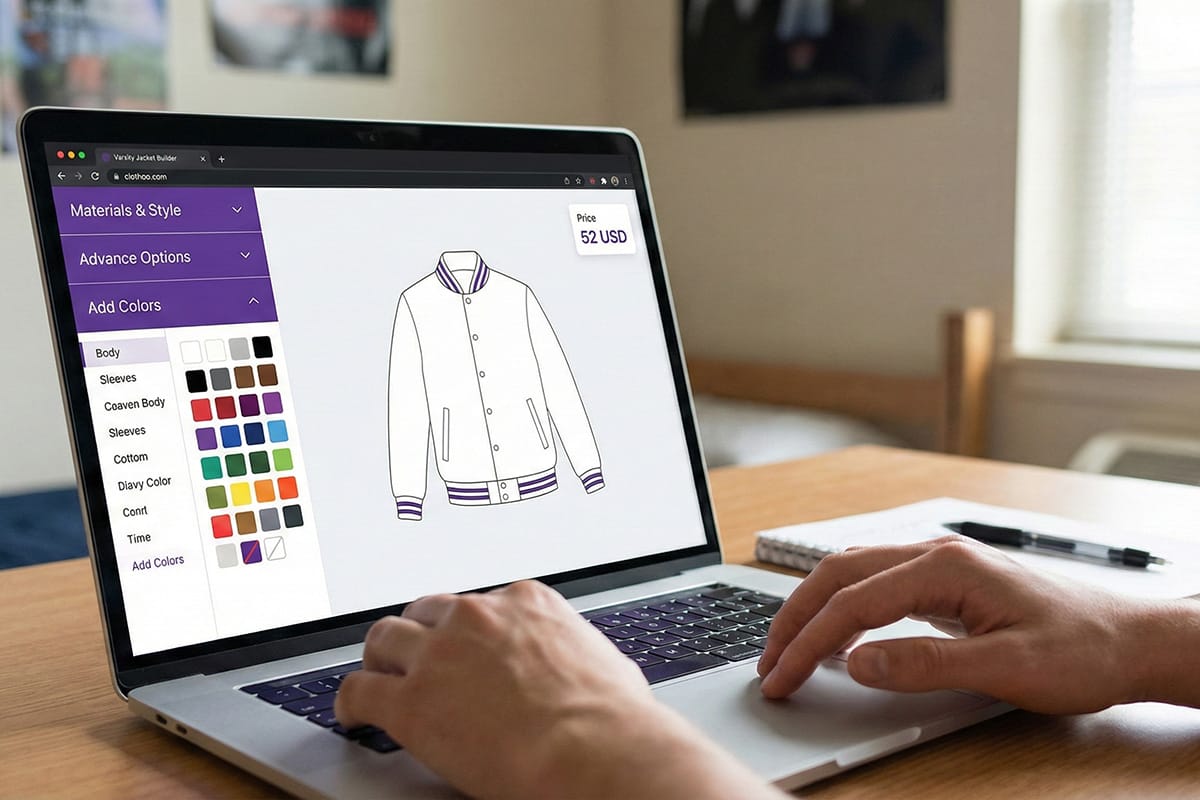
Spending a short block of time on planning turns the online session into simple data entry. You already know what you want; the builder just helps you see it on a clean preview, like the Clothoo screen with the jacket outline, color tiles, and price in the corner.
What to prepare before you open the builder
Grab a notepad or a basic sheet. You do not need perfect art yet, but you do need a few decisions in place.
- A list of who is getting a jacket and their role: player, band, staff, or corporate.
- A first choice for jacket type: varsity, bomber, coach jacket, hoodie, or puffer.
- Your main school, team, or brand colors, including light and dark shades.
- Any logos, mascots, or symbols you plan to place on chest, sleeves, or back.
- Draft text for names, numbers, titles, and short phrases.
- A target delivery date and rough budget per jacket.
Keep this prep sheet next to you when you head into the main design your own page so you are never guessing on the fly.

Step-by-step workflow for designing a custom jacket online
The builder itself handles the clicks and the live preview. Your job is to bring a clear plan for each section. This workflow lets you move from big picture to small details without circling back.
Step one: set your jacket game plan
Start with purpose. Is this jacket for Friday night games, everyday campus wear, or a company retreat? Is it a one-time senior piece or a design you want to reuse for years?
Write one short line that answers those questions. For example, “warm jacket for band kids at late fall games” or “lightweight jacket for staff on casual days.” That line will guide every fabric and color choice you make later.
Step two: match styles, materials, and colors to that plan
Once you know the job, you can pick the broad style and fabric. Use your plan line to decide whether a varsity, bomber, coach jacket, hoodie, or puffer makes the most sense. Then think about materials and weight. Check wide range of ready-made varsity jackets.
If you need help here, open the materials and colors guide while you work. That page explains how wool, fleece, satin, nylon, and other fabrics behave in different seasons, and shows real shade options you can match to your school or brand.
Only after you settle on style and fabric should you move on to panel colors. Pick body, sleeves, and knit trims that match your main colors and still look good in everyday life, not just on a screen.

Step three: map out patches, logos, and names
Now plan the story your jacket will tell. Decide which elements are non-negotiable and where they should live. Use a simple sketch or outline if it helps: chest letter, back mascot, sleeve numbers, front name, and so on.
Think in layers: big, bold items first, then small detail. Large chest letters, back pieces, and sleeve numbers usually come first. Names, roles, and sponsor marks follow. The customizing tips page shows common placement patterns for school jackets, bombers, and other styles if you want sample layouts.
At this stage, you do not have to lock every patch type. You just need a clear map so when the builder asks about chest, back, and sleeve zones, you already know what goes where.
Step four: organize sizes and wearer details
Before you ever click a size menu in the builder, finish your roster. For each person, note their size, role, and any special details like number or title. Big and tall wearers might need notes on sleeve length or extra room for layers.
This step keeps the builder session short. Instead of guessing, you copy the list into the order. You can even mark a few extras or “spares” in popular sizes if your budget allows.
Step five: review and hand off to the online builder
Now you are ready to move from paper to screen. With your plan in hand, open the online jacket builder and simply walk through each section: pick the jacket type you chose, set materials and panel colors based on your notes, then add patches and names in the zones you already mapped.
The preview screen shows every change in real time, like the sample designer image with the jacket in the center and panels on the side. If something looks off, adjust a color or placement and update your written plan so future orders stay consistent.

Quick pre-order checklist for custom jackets
Right before you submit, pause for one last check. Use this short list to catch simple mistakes while they are still easy to fix.
- Compare the on-screen jacket to your written plan for style, fabric, and key colors.
- Scan front, back, and sleeve views for missing patches or logos.
- Double-check spellings for all names, titles, and locations.
- Match each size in the builder to your roster list line by line.
- Confirm that notes cover any special requests or placement needs.
- Save or screenshot the final preview so you have a record for future reorders.
Once this checklist looks good, you can approve the design and finish the order flow knowing the hard thinking happened before you ever entered a card number.
![]()
FAQs about planning and designing a custom jacket online
Q: How long does it take to work through this plan and the builder?
A: Many groups spend 20–30 minutes on planning and about the same amount of time in the builder. Larger teams take longer because you are matching sizes and names, but the process still moves faster when you start with a clear worksheet.
Q: What is the first thing I should decide before I touch the tool?
A: Decide what the jacket is for and when it will be worn. Once you know if it is for cold games, light campus days, or company events, it is much easier to pick style, fabric, and lining.
Q: Do I need final artwork before I start?
A: It helps, but it is not required. You should at least know which logos or mascots you plan to use and where you want them placed. The builder and the customizing tips can help you refine the exact patch look later.
Q: Can I reuse the same plan for future orders?
A: Yes. Many schools and groups keep one “master” plan that covers style, fabric, and main layout. They simply update names, numbers, and small details each year while keeping the core design the same.
Q: Where can I see more about fabrics and colors before I decide?
A: For weight, warmth, and shade comparisons, the materials and colors guide is the best place to start. After that, you can put those choices into the online builder and use this planning guide as your map.